This blog post describes my experience of learning how to write iOS software, after having spent many years exclusively in the world of .NET development. It provides warnings, suggestions, and tips for others who are interested in learning iOS development. The post ends with a qualitative comparison of programming in WPF and iOS.
[UPDATE: July 17, 2012] I self-published a book that explains iOS to .NET devs. It is titled iOS Programming for .NET Developers. Learn more about it here http://iosfordotnetdevs.com
Why iOS
About a year and a half ago, I realized the world had changed. Apple was dominating the mobile market, a computing space rapidly gaining importance and relevance in the business world. Microsoft wasn’t even close to catching up. In fact, they aren’t even close yet, as far as I can tell.
Despite my years of investment in becoming a Windows desktop software developer, and my four years as a Microsoft MVP, I decided to branch out into totally foreign territory. I bought a MacBook Pro, a heap of books for iOS noobs, and started from scratch. This was not an easy or comfortable decision, by any means, but it was the logical thing to do. So, I did it.
What I have accomplished so far
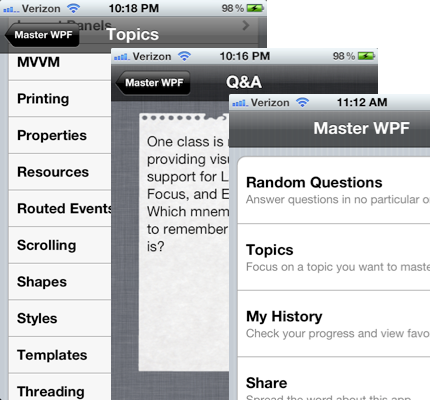
So far in my voyage as an iOS developer I have worked on three apps successfully launched and used in production. Two of them are iPhone apps that I wrote and published to the iTunes App Store: Master WPF and Two Letters.
Where I gained the most experience with iOS was working as Technical Lead on an iPad project for Trane. The app assists salespeople in selling residential HVAC systems to homeowners. You can watch a brief video about the app on my employer’s Web site here (scroll down the page a bit to watch the video).
Words of warning
I have had quite a few people ask me how I went about becoming a competent iOS programmer, usually because they want to become one, too. I warn that it will take a considerable amount of time, effort, and patience to get over the learning curve. If you think that going from WinForms to WPF requires a major mental adjustment, you ain’t seen nothin’ yet.
When you move to iOS, you will need to leave behind most of what you know about UI programming from the .NET world. Fundamental things like object-oriented programming, virtual methods, properties, and loops are still relevant, and having knowledge of those things is essential. But knowledge alone won’t be enough to get you up and writing an iOS app.
You will need to re-map your existing concepts and knowledge onto a new programming language, UI platform, APIs, operating system, IDE, keyboard shortcuts, debugger, error messages, etc. This takes time, and can be frustrating for people who are accustomed to being competent and productive in another environment.
Lastly, if you are a closed-minded person, don’t even bother. I found that switching from .NET to iOS programming required me to learn a very different way to think about writing software. I’m not saying it’s better or worse than what I already knew, just different. If you can’t admit that your technology of choice isn’t superior to all others, just stick with what you know and avoid the frustration. Successful, productive learning requires acceptance and humility.
The Eightfold Path
Once you decide to take the plunge into iOS programming, it might help to have a roadmap to follow. What follows is a high-level overview of the eight things I suggest doing and learning, to become competent at iOS development. Some of these steps overlap each other, but the overall progression of topics is the key takeaway.
Step 1: Pay Apple
You need to buy an Apple computer, an iDevice (iPhone, iPad, iPod Touch), and pay $99 per year to be in the iOS Developer program. Joining the iOS Developer program is necessary so that you can run your apps on your iDevice. It also grants you access to a large number of useful developer resources on Apple’s site.
Step 2: Objective-C
If you were to move to a foreign country, the first thing you would probably want to do is learn the native language. The same applies here. Objective-C is the language of iOS. There are others, such as Objective-C++, but almost all iOS developers use Objective-C.
I’m sure there are many good books out there that teach Obj-C, but I read and enjoyed “Learn Objective-C for the Mac”.
Step 3: Xcode
Xcode is the Visual Studio for iOS developers. Apple gives Xcode away for free, even if you don’t join the iOS Developer program you can get it. Xcode is where you write your code, design your screens, debug issues, configure provisioning files, analyze memory leaks, etc. You will spend a lot of time in Xcode, so it pays to spend some time learning how to use it.
Check out the Pragmatic Bookshelf screencasts about Xcode here.
Step 4: Memory Management
iOS does not have a garbage collector. Instead, it provides you with a very simple API that implements reference counting. This means that an object is immediately removed from memory when all “owners” of that object relinquish ownership. Before iOS 5 you needed to write all of that memory management code into your apps. Now, with iOS 5, there is a wonderful new compiler service called Automatic Reference Counting (ARC) which inserts the memory management code for you.
ARC is awesome, but I highly suggest that you don’t use it until you can manage memory yourself. In other words, don’t rely on ARC until you understand what it’s doing. There are many reasons for this; one of the most practical of which is the fact that most iOS sample code is pre-ARC.
My memory management bible, which I returned to many times until I finally “got it,” can be found here. You’ll probably need to read more in-depth explanations of memory management before that blog post will make sense and be useful.
Step 5: Interface Builder
Interface Builder, normally referred to as IB, is an excellent tool that allows you to build user interfaces via drag-and-drop. Before Xcode 4 came out, IB was a separate stand-alone tool that was loosely integrated with Xcode. Starting in Xcode 4 it was moved into Xcode, enabling a more familiar design-time experience for .NET developers.
IB rocks. It’s so good that I have never once needed to look at the XML it generates to serialize UIs. Imagine using Cider or Expression Blend and never needing to look at and edit XAML by hand!
Step 6: CocoaTouch
CocoaTouch is to iOS as WPF is to Windows. It’s what you use to create beautiful user interfaces that do real work. CocoaTouch is a high level library, built on top of several lower level libraries, such as Core Graphics and Foundation. It is a library with many frameworks and APIs, ranging from touchable Buttons, to customizable maps, to video players, to device-level notifications. It also has deep and rich support for the Model-View-Controller design pattern baked in, including a full navigation system based on view controllers.
The best book I know of for learning CocoaTouch is the one from the Big Nerd Ranch.
Step 7: Core Data
Once you are comfortable with the language, IDE, and UI platform there is still one more topic you need to wrap your head around. It’s called Core Data. It’s a framework, by Apple, that simplifies working with an application’s data. It does a lot of things for you, including mapping entity classes to SQLite tables (or other backing stores) and translating high-level queries into low-level queries and executing them for you.
The book that I read to learn Core Data is called “Pro Core Data for iOS”. Apple also provides a lot of great documentation about Core Data.
Step 8: Publish Apps
Don’t just write apps. Publish them to the App Store. Apple can reject your app, and prevent it from being available in their App Store, for many reasons. Professional iOS developers need to know how to create iOS software that will be approved by Apple. Plus, these days, companies looking for iOS developers require that you can demonstrate your skills by having published apps. If you don’t have apps in the App Store, you’ll be at a huge disadvantage when applying for iOS jobs.
Apple recently published their own roadmap for getting started with iOS development here. I haven’t checked it out in depth, but it is getting rave reviews so far.
Comparing Apples and Microsofts
The last topic I would like to touch on, which is also the most difficult to communicate, is a qualitative comparison of WPF and iOS programming. This is inevitably subjective and circumstantial. I hope it conveys an impression of what one can expect when developing iOS software.
Apple expects developers to be smarter than Microsoft does. Microsoft works hard to ensure that programming technologies are usable by as broad a range of people as possible. Their tooling and documentation assume you aren’t quite sure what you’re doing. Apple, on the other hand, is not nearly as helpful and pandering. I’m not saying either approach is intrinsically better or worse, but as a reasonably intelligent developer I prefer not being handled with kid gloves.
Visual Studio has way better visual debugging tools than Xcode. Apple has been improving their debugging tools in each release of Xcode, but the debugging experience for a WPF developer exceeds that of an iOS developer any day of the week.
Objective-C is very weird at first. It takes some getting used to. Once you become accustomed to the odd-looking syntax, however, it’s actually rather simple and pleasant to work with. Compared to C# it is much less feature-rich, but that hasn’t been a problem for me. I have enjoyed writing Obj-C quite a bit.
iOS apps run lightning fast. Not having the overhead of a managed runtime environment, a garbage collector, code-access security, etc. really helps keep iOS apps fast and easy on the battery. Remember, when writing mobile software, battery is king and speed is a close second. Objective-C is basically plain old C with some extra keywords that support object-orientation, and a very lightweight runtime also written in C. It’s really, really fast.
In iOS you don’t decorate user interfaces with renderings created and styled in markup. Instead, you use bitmap images (typically, PNG images) or, in more demanding scenarios, draw to the screen in code. Since iOS apps exist in a fixed size window, you generally don’t need to worry as much about having resizable graphics, so using images is easier, assuming you have a way to get the images in the first place.
The primary design pattern used for structuring UIs is Model-View-Controller (MVC), not Model-View-ViewModel (MVVM) like in the WPF and Silverlight worlds. As I mentioned above, CocoaTouch has full support for MVC baked in. It’s quite nice to have that in the platform, because it’s less code you need to write and maintain. In my Master WPF app, I actually used ViewModels in one screen, but that’s a topic for another post.
Abort()
This blog post was not intended to persuade or dissuade you to or from iOS. I don’t care what kind of programming you decide to do. Hopefully this has given you some insight into what it has been like for a .NET guy to try out something new and different. Maybe you learned a thing or two along the way.
Have a great day!


 Posted by Josh Smith


