This blog post explains what routed commands are, and why you should use them. My explanation does not cover all of the details, nor does it show all of the various uses of routed commands. For a more comprehensive review of commanding, but with a very different (and somewhat misleading) perspective on the issue, be sure to check out the official documentation here.
Many demonstrations of routed commands explain them in the context of text editing, which is just one of the many ways to use them. In fact, so many explanations about routed commands focus on how to use them in text editing scenarios that many people I have met assume routed commands have no practical use outside of text editing. That is an incorrect, yet understandable, interpretation of one of WPF’s coolest features.
What is a routed command? Well, the answer to that question is too complicated to explain without first taking a step back and explaining some other things. To understand what a routed command is, we will examine what “routed” means, and then what “command” means. Once we have those two ideas defined, we can combine them and see what happens.
Routed
In WPF, the visual elements that constitute a user interface form a hierarchical tree structure. This “element tree” has many purposes, and is a core part of how WPF operates. The root node in the tree is a container, such as a Window or a Page. Everything seen within that top-level container is a descendant element in its element tree. There are two “views” of this element tree: the visual tree and logical tree. To learn more about that concept, I recommend you read this article.
In general, the term “route” refers to a path between two points in a network. Take that idea and apply it to the WPF element tree, and now you have a path between visual elements in a user interface. Now imagine an electric current quickly flowing through that route, zapping each element it passes through. When an element is zapped by the electric current, it has the opportunity to come to life and do whatever it wants (i.e. execute an event handler). That is pretty much how I think about routed events, except my complete mental model involves unicorns, robots, and laser beams, as seen in the diagram below:

…just kidding.
One could provide a more mundane definition of a routed event as a notification that travels a route between two elements in the WPF visual tree. They are not really events, in the standard sense of .NET events. People wrap routed events with standard .NET events, out of convention, just to make them more usable and “.NETish.” But in reality, routed events are not events. They are a feature of the WPF framework, intimately tied to the WPF visual tree.
Routed commands use routed events, as do many other parts of WPF, so it is important to understand them thoroughly. If you are still hazy on the idea of routed events, check out the blog post I wrote about the topic here.
Command
The Command pattern is nothing new. It means that you create an object that knows how to do some task, and then the entire application relies on that object to do that task. For example, if I am creating an image editing application, I could create a command object called “CreateNewImage” or something like that. When the user either clicks the “New” menu item, or clicks the “New” toolbar button, or hits Ctrl + N, etc., the same CreateNewImage command object would create a new image.
In WPF, we have the ICommand interface, which makes it easy to create command objects that WPF classes can use. When you implement ICommand, you place all the knowledge of what needs to be done to accomplish the task in the command. You can then assign that command to, say, a Button’s Command property so that the command will execute when the user clicks the Button.
The ICommand interface has three members that all commands must define. It has two methods and one event. The CanExecute method determines if the state of the application currently supports the execution of the command. If CanExecute returns true, then the Execute method can be invoked, which is what actually performs the execution logic baked into the command. If CanExecute returns false, all controls whose Command references that command object are disabled so that the user cannot attempt to execute the command at that time. This is a very convenient feature, especially if multiple controls in the user interface all are bound to that command.
If the command determines that it’s “can execute” status changes, it can raise the CanExecuteChanged event, defined by the ICommand interface. This lets WPF know that it should call the command’s CanExecute method again, to query the new status.
Routed + Command = RoutedCommand
So what happens when you mix routed events with commands? Well, you get a very powerful way to think about how an application represents and implements its features. You get routed commands.
A routed command is a command object that does not know how to accomplish the task it represents. It simply represents the task/feature. When asked if it can execute and when told to execute, it simply delegates that responsibility off to somewhere else.
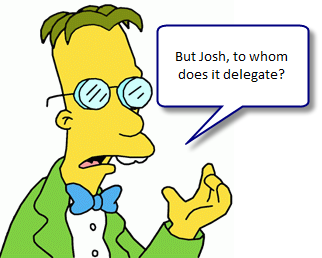
The answer is, confusingly enough, it does not know whom.
A routed command does not determine if it can execute and what to do when executed. Instead, some routed events travel through the element tree, giving any element in the UI a chance to do the command’s work for it. It truly is just a semantic identifier: a named entity that represents a feature of a program.
When a routed command is asked if it can execute, the routed PreviewCanExecute and CanExecute events tunnel down and bubble up the element tree. These events give all elements between the root of the tree (such as a Window) and the source element that references the command a chance to determine if the command can execute. When the command is told to execute, the PreviewExecuted and Executed routed events travel the same event route, checking to see if anybody cares to react to the event. If so, they can run a handler for the event, if not, the event finishes zapping the elements and nothing happens.
Who Cares?
You might be wondering why it is a good idea to use routed commands at all. Why bother? What’s wrong with just hooking a Button’s Click event and doing things the “normal” way?
Well, you do not have to use routed commands if you do not want to. You certainly can just hook a Button’s Click event and go to town. By extension, why bother with a data layer and a business layer? Why not just stick your whole application into Window1.xaml.cs and be done with it? That would be much easier, right?
My point is, there are very real advantages to adhering to the loose coupling proffered by routed commands. Let’s review them.
First, all controls using the same RoutedCommand will automatically be disabled when the command cannot execute. If you have ever used a program where clicking on enabled buttons does not actually do anything, you will appreciate this.
Second, there is less event handler code to write since most of the wiring is provided for you by the commanding system. You do not have to add event handlers for each UI element that executes the same command, whereas using events directly off of UI elements requires many handlers that all basically do the same thing.
Third, if you use my implementation of Model-View-Controller or Structural Skinning, using routed commands is an absolute must. Learn more about MVC here and Structural Skinning here.
Fourth, using routed commands makes it possible to decouple the Software Engineering team from the Visual Design team. The developers don’t have to worry about what type of element is consuming application functionality, just as long as the UI executes the right commands all is well. This also frees the designers from having to worry about such details so that they can focus on creating a great user experience.
Fifth, but certainly not last, using routed commands as part of your design process forces you to map functional requirements to commands up front. This process of taking a list of required features and translating them into RoutedCommand objects with meaningful names is invaluable to help the team as a whole understand the system they are about to build. It also creates a set of short terms that people can use to refer to features.
Show me Some Code
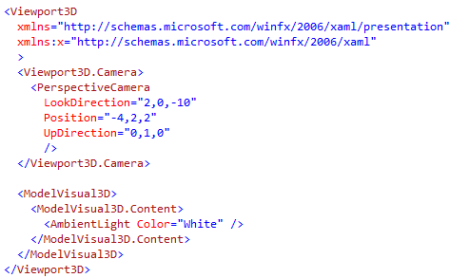
I threw together a quick demo project in Visual Studio 2008, showing the simplest possible usage of a custom routed command. Download the code here: Routed Command Demo Be sure to rename the file extension from .DOC to .ZIP and then decompress the file.


 Posted by Josh Smith